Roasted Sweet Potato Wedges
Welcome to your new favorite side dish adventure! I’m absolutely thrilled to share this foolproof recipe. It’ll have your family asking for seconds and thirds.
These golden, crispy-on-the-outside, fluffy-on-the-inside wedges are your new comfort food. They’re perfect for a casual dinner party or to make weeknight meals special. This dish offers a perfect balance of sweetness and savory flavors.
I’ve spent countless hours perfecting this technique. I’m excited to guide you through every step! You’ll see how simple ingredients become spectacular when cooked right.
This recipe is part of my favorite sweet potato recipes that always impress. Get ready to delight your taste buds and make your guests happy with every bite!
Why Sweet Potato Wedges Are the Perfect Side Dish
Golden, crispy wedges from sweet potatoes are the ultimate side dish. They offer amazing flavor, great nutrition, and a satisfying crunch. They’re perfect for any meal, from weeknights to special occasions.
They turn a simple veggie into something amazing. The natural sweetness and savory seasonings create a perfect taste. This dish pleases everyone at your table.
Nutritional Benefits of Sweet Potatoes
Sweet potatoes are nutritional powerhouses that make you feel good about serving them. They’re full of beta-carotene, which turns into vitamin A for healthy eyes and immune system. One medium sweet potato gives you over 400% of your daily vitamin A!
These orange veggies are also rich in fiber, potassium, and vitamin C. Fiber keeps you full, while potassium is good for your heart. They’re also fat-free and have antioxidants that fight inflammation.
Versatility for Different Meals
Sweet potato wedges are incredibly versatile. They’re great with grilled chicken for a healthy dinner. At holidays, they add sweetness to turkey and ham.
For vegetarian meals, they’re a star with salads or roasted veggies. Try them with eggs and avocado for a nutritious breakfast.
They’re a hit at barbecues and dinner parties. Guests love their taste and the sophisticated touch they add.
Cost-Effective and Family-Friendly Option
Sweet potatoes are budget-friendly, perfect for stretching your budget. They’re cheap in bulk, making them ideal for feeding a family.
Kids love their natural sweetness, while adults enjoy the complex flavors. This makes dinner planning easy, as everyone loves them.
They’re great for meal prep too. Cut and season them ahead, then roast when needed. This saves time and ensures a healthy, tasty side dish.
Essential Ingredients for Perfect Roasted Sweet Potato Wedges
Every amazing batch of sweet potato wedges starts with three key ingredient categories. I’ve perfected these over years of cooking. These basics turn your sweet potatoes into a healthy side dish that everyone loves! You don’t need fancy ingredients or techniques.
Quality is more important than quantity. The right sweet potatoes, seasonings, and oil make flavors develop naturally. Your kitchen will smell amazing, and the results are incredible!
Choosing the Right Sweet Potatoes
The foundation of great wedges starts at the grocery store! Look for medium-sized sweet potatoes that feel firm and heavy. They should have smooth, unblemished skin without soft spots or dark patches.
Orange-fleshed varieties are best for roasting because they caramelize well. Avoid large potatoes as they take too long to cook. Medium potatoes make perfectly cooked wedges every time.
Here’s my pro tip: give them a gentle squeeze. Fresh sweet potatoes should feel solid, not spongy. If they sprout or wrinkle, keep looking!
Must-Have Seasonings and Spices
My spice cabinet essentials create the perfect balance of flavors. Sea salt and black pepper enhance the natural sweetness without overpowering it.
Paprika adds color and mild smokiness, while garlic powder brings depth. A pinch of cayenne adds a gentle kick. These four seasonings work magic together.
For variety, try these winning combinations:
- Rosemary and thyme for an earthy, herbal flavor
- Cumin and chili powder for southwestern flair
- Cinnamon and nutmeg for a sweet twist
Oil Selection for Optimal Crispiness
Olive oil is my top choice for flavor and health benefits. It creates a golden, crispy exterior while adding richness. Extra virgin olive oil is perfect for roasting temperatures.
Avocado oil is also great, even at higher temperatures. It has a neutral taste and excellent heat stability. Both oils help create that crispy texture while keeping your dish healthy.
Use just enough oil to lightly coat each wedge. Too little and they dry out, too much and they get soggy. About one to two tablespoons per large sweet potato is perfect!
Kitchen Tools and Equipment You’ll Need
Having the right kitchen tools makes creating perfect oven roasted potatoes easier! I’m excited to share the essential equipment for sweet potato wedge success every single time.
You don’t need a fancy kitchen to make amazing results happen. With just a few key tools, you’ll be slicing, seasoning, and roasting like a pro!
Essential Cutting and Preparation Tools
Let’s start with the absolute must-haves for prep work. A sharp chef’s knife is your best friend here – trust me on this one! Dull knives make cutting sweet potatoes feel like a workout, and they create uneven wedges that cook inconsistently.
I recommend an 8-inch chef’s knife for the perfect balance of control and cutting power. Pair it with a sturdy cutting board that won’t slide around your counter. Bamboo or thick plastic boards work wonderfully and won’t dull your knife.
Here are the cutting essentials you’ll need:
- Sharp chef’s knife (8-inch preferred)
- Non-slip cutting board
- Kitchen towel for cleanup
- Large mixing bowl for tossing
Baking Equipment for Best Results
The right baking equipment makes all the difference between soggy disappointments and crispy perfection! Heavy-duty rimmed baking sheets are absolutely essential – they distribute heat evenly and prevent those frustrating hot spots.
I swear by using parchment paper on every single batch. It creates a non-stick surface that makes cleanup a breeze and prevents sticking without adding extra oil.
Your baking essentials include:
- Two large rimmed baking sheets
- Parchment paper or silicone mats
- Oven thermometer for accuracy
- Timer (your phone works great!)
Make sure your baking sheets are at least 18×13 inches. This gives your wedges plenty of space to crisp up without overcrowding.
Optional Tools for Enhanced Cooking
While not absolutely necessary, these bonus tools can take your sweet potato game to the next level! A wire cooling rack is fantastic for achieving extra crispiness by allowing air to circulate underneath your wedges.
A large mixing bowl makes tossing wedges with oil and seasonings so much easier. You’ll get perfectly coated pieces every time without the mess!
Consider these helpful additions:
- Wire cooling rack
- Large mixing bowl
- Silicone spatula for gentle flipping
- Kitchen scale for consistent sizing
Don’t worry if you don’t have every fancy gadget – the basics will get you amazing results every time! Start with the essentials and add tools as you discover what works best for your cooking style.
Step-by-Step Preparation Guide
Ready to make those sweet potatoes into crispy, golden wedges? The secret to success is in the preparation. I’ll share my top tips for sweet potato cooking that are easy and effective.
Getting the basics right makes all the difference. Let’s go through each step together!
Washing and Peeling Techniques
First, clean the sweet potatoes well. Scrub them under cool water with a vegetable brush.
Make sure to remove all dirt from the skin’s grooves. Here’s the best part – we keep the skin on! It adds flavor and nutrients to your wedges.
After cleaning, dry the potatoes with a towel. This step helps prevent moisture problems when cutting.
Cutting Sweet Potatoes into Perfect Wedges
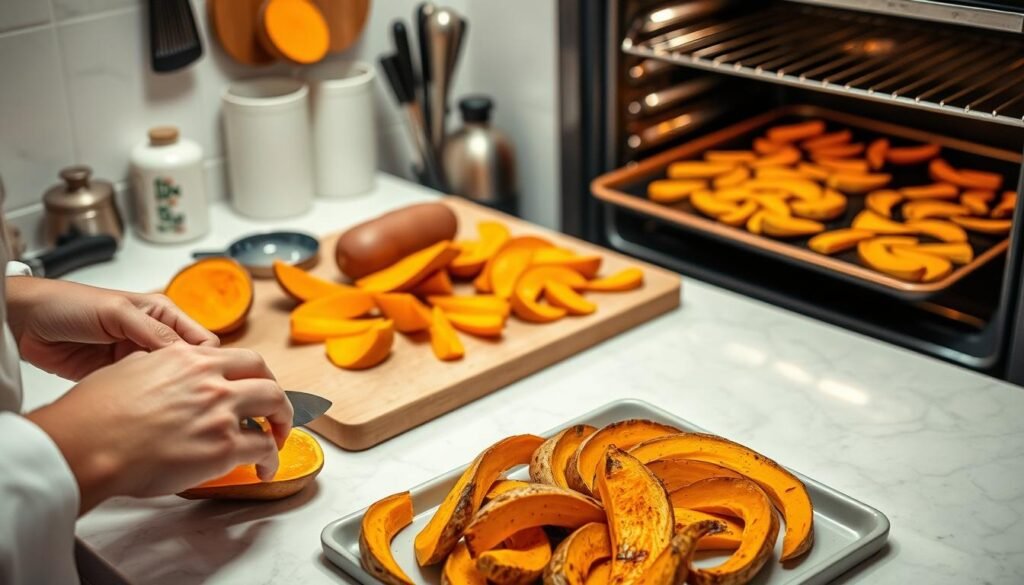
Now, let’s cut the potatoes into even wedges. Start by slicing each potato in half lengthwise.
Place each half cut-side down on your cutting board. Cut each half into 3-4 wedges, depending on size. Consistency is key – aim for wedges of the same thickness.
I cut my wedges about ¾ inch thick. This size ensures a crispy outside and fluffy inside, making sweet potato cooking rewarding.
Pre-Treatment Methods for Extra Crispiness
My secret for extra crispiness is soaking the wedges in cold water for 30 minutes.
This step removes excess starch, helping you achieve that golden crust. Don’t skip this step – it’s a game-changer!
While soaking, prepare your seasonings and preheat your oven. The timing is perfect for efficient cooking.
Proper Drying Techniques
After soaking, drain the wedges and dry them on paper towels. Pat each wedge dry – and I mean completely!
Any remaining moisture will cause steam instead of a golden crust. Take your time with this step for crispy results.
I let them air dry for 5-10 minutes after patting. This extra effort makes your sweet potato cooking amazing!
Seasoning and Coating Your Wedges
Now it’s time to add amazing flavors to your wedges. This turns ordinary sweet potatoes into irresistible, crispy treats that everyone loves. The key is to mix oil and seasonings just right, with a lot of love and care.
Getting your coating right is key to making great wedges. I’ve found that taking your time and making sure everything is evenly coated makes all the difference. It’s all about the details!
Basic Seasoning Combinations
Here’s a simple seasoning mix that always impresses. It’s easy to make and always results in perfectly seasoned wedges.
My go-to basic seasoning mix includes:
- 1 teaspoon salt
- 1 teaspoon paprika
- 1 teaspoon garlic powder
- Generous pinch of black pepper
This mix is foolproof and delicious! Paprika adds color and smokiness. Garlic powder adds depth. Salt brings out the natural sweetness of the potatoes.
Advanced Flavor Profiles
Want to try something new? These exciting flavor combinations will amaze you!
Southwestern kick blend:
- Smoky chipotle powder
- Ground cumin
- Chili powder
- Lime zest
Elegant herb-crusted version:
- Fresh rosemary (finely chopped)
- Dried thyme
- Garlic powder
- Sea salt
These advanced profiles give you restaurant-quality results at home! The herb mix adds sophisticated flavors that go great with roasted meats.
Proper Coating and Mixing Techniques
Technique is important here! Use about 2-3 tablespoons of oil for every 2 pounds of wedges. This ensures they’re crispy without being greasy.
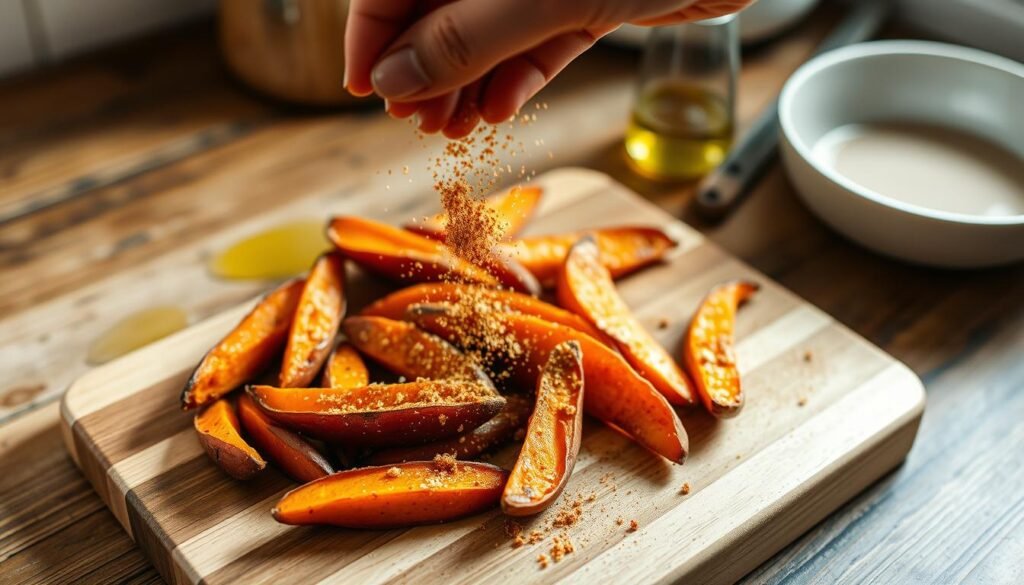
Start by placing your dried wedges in a large bowl. Drizzle oil over them, then sprinkle seasonings on top. Now, get ready for the fun part – get your hands dirty!
Toss everything together with your hands for even coverage. This hands-on approach ensures every wedge is coated perfectly. Make sure each piece is shiny with oil and covered in seasonings.
Pro tip: Don’t be shy about working those seasonings in! The more effort you put into this step, the more flavorful your wedges will be. Every bite should be perfectly seasoned and crispy.
Mastering the Roasting Process
The roasting process is where the magic happens, turning your seasoned wedges into irresistible baked sweet potatoes! This stage transforms all your hard work into golden, crispy perfection. I’m excited to share the techniques that guarantee restaurant-quality results every single time.
Success depends on getting every detail right – from temperature to timing to proper flipping technique. Don’t worry though! Once you master these simple steps, you’ll create consistently amazing wedges that’ll have everyone asking for your secret.
Optimal Oven Temperature and Timing
Preheat your oven to 425°F – this high heat is absolutely essential! Lower temperatures won’t give you that gorgeous caramelized exterior we’re after. The intense heat creates the perfect contrast between crispy outside and fluffy inside.
Plan for 25 to 30 minutes total cooking time. But don’t just set a timer and walk away! Every oven behaves differently, and sweet potato sizes vary. Start checking at the 20-minute mark to avoid overcooking.
The key is watching for visual cues. You’ll see the edges start to caramelize and turn golden brown. That’s when you know the magic is happening!
Proper Pan Arrangement and Spacing
Spread those beautiful seasoned wedges in a single layer with space between each piece. This spacing is key! Overcrowding leads to steaming instead of roasting, and nobody wants soggy wedges.
Use a large rimmed baking sheet or two smaller ones if needed. I prefer lining mine with parchment paper for easy cleanup. Make sure no wedges are touching – they need room to breathe and crisp up properly.
Position your pan in the center rack of the oven. This ensures even heat distribution from all sides. Avoid the top rack, which can cause burning, or the bottom rack, which may leave wedges undercooked.
When and How to Flip for Even Cooking
At the 15-minute mark, flip each wedge using tongs or a wide spatula. This step ensures beautiful browning on both sides! Be gentle but confident – you don’t want to break those perfectly cut wedges.
Look for golden-brown color on the bottom before flipping. If they’re not yet golden, give them another 2-3 minutes. Patience pays off with better results!
After flipping, spread them out again with proper spacing. Return to the oven for the remaining 10-15 minutes. This second phase creates that irresistible crispy texture on both sides.
Testing for Perfect Doneness
You’ll know your baked sweet potatoes are perfectly done when they’re golden brown and crispy on the outside. A fork should easily pierce the thickest part without resistance. The edges should be slightly caramelized and gorgeous!
Here’s my favorite test: tap them gently with a utensil. They should sound crispy, not soft or mushy. Trust your senses – the amazing aroma will tell you when they’re ready to steal the show!
If they need more time, continue roasting in 3-5 minute intervals. Better to check frequently than end up with burnt wedges. Perfect timing creates the ultimate balance of crispy exterior and tender, fluffy interior that everyone craves!
Creative Variations and Flavor Combinations
Explore the world of creative seasonings to make your sweet potato wedges irresistible! The beauty of potato wedges recipes is their versatility. You can change them into different dishes with just new spices. I’m excited to share my favorite flavor combinations that will have your family asking for more!
Mastering the basic roasting technique is key. Then, experimenting with different seasonings is the most fun. Each spice blend offers a unique taste experience, taking your taste buds on a journey or satisfying any craving.
International Spice Blends
Transform your potato wedges with global flavors for a culinary adventure! My favorite is the Middle Eastern mix of za’atar and sumac. It adds a tangy, herby flavor that’s addictive.
For an Indian twist, try garam masala, turmeric, and cumin. These warm, aromatic spices bring out the sweet potatoes’ natural sweetness.
Don’t miss out on Cajun seasoning for a Southern kick or Italian herbs for a Mediterranean vibe. Even everything bagel seasoning is great for something familiar yet exciting!
Sweet and Savory Coating Options
Now, let’s explore sweet and savory combinations that will amaze you! Brown sugar and chili powder create a perfect balance of heat and sweetness.
My maple syrup and Dijon mustard glaze is another winner. Whisk them together and brush on during the last 10 minutes of roasting. The result is glossy, flavorful wedges that taste like they came from a fancy restaurant!
Try honey with smoked paprika or cinnamon with cayenne pepper. These combinations work because sweet potatoes naturally bridge sweet and savory flavors.
Healthy Alternative Seasonings
For those watching their sodium, herb-only seasonings are fantastic! Fresh rosemary, thyme, and oregano create an aromatic, garden-fresh flavor that’s light yet satisfying.
Nutritional yeast adds a cheesy, umami flavor without dairy. Mix it with garlic powder and dried herbs for a healthy potato wedges recipe that doesn’t sacrifice taste.
Lemon zest with fresh herbs is another brilliant combination. It brightens the natural earthiness of sweet potatoes while keeping things clean and healthy. These alternatives prove you don’t need heavy seasonings to create amazing flavor!
Serving Suggestions and Storage Tips
Your perfectly roasted sweet potato wedges deserve the perfect finishing touches! The right dipping sauces and smart storage methods can transform these golden beauties from a simple side dish into the star of your meal. Let me share my favorite ways to serve and preserve these delicious wedges!
Best Dipping Sauces and Accompaniments
The magic happens when you pair your sweet potato wedges with amazing dipping sauces! My top three favorites never fail to impress guests.
Creamy garlic aioli brings out the natural sweetness beautifully. Mix mayonnaise with minced garlic, lemon juice, and a pinch of salt. The creamy texture contrasts perfectly with the crispy exterior!
Tangy honey mustard adds the perfect sweet-and-sour balance. Combine Dijon mustard with honey and a splash of apple cider vinegar. This sauce complements the earthy flavors wonderfully.
For heat lovers, spicy sriracha mayo is absolutely divine! Blend mayonnaise with sriracha sauce and a squeeze of lime. The spicy kick elevates every bite!
Meal Pairing Ideas
These versatile wedges work beautifully with so many different meals! They’re incredible alongside grilled chicken – the smoky flavors complement each other perfectly.
Roasted pork tenderloin pairs wonderfully too. The sweet potato’s natural sugars balance the savory meat beautifully. You’ll love this combination!
For vegetarian options, create a colorful bowl with quinoa and other roasted vegetables. Add some fresh herbs and a drizzle of tahini dressing. It’s both nutritious and satisfying!
These wedges also make fantastic appetizers for entertaining. Set up a dipping sauce station with multiple options. Your guests will be impressed by this crowd-pleasing starter!
Proper Storage and Reheating Methods
Smart storage keeps your wedges delicious for days! Store leftover wedges in an airtight container in the refrigerator. They’ll stay fresh for up to four days.
Skip the microwave when reheating – it makes them soggy! Instead, pop them back in a 400°F oven for 5-8 minutes. They’ll regain that perfect crispiness!
You can even freeze cooked wedges for up to three months. This makes meal prep so much easier! Reheat them straight from frozen in the oven.
These storage tips mean you can always have a delicious side dish ready to go. Perfect for busy weeknights or unexpected guests!
Conclusion
You now have all you need to make perfect sweet potato wedges. They’re a favorite easy side dish for many. Delicious food doesn’t have to be hard to make.
These wedges are simple yet versatile. They’re great with grilled chicken on a busy night or at a potluck. You can use basic spices or try something new.
Sweet potato wedges are a standout among easy sides. They’re healthy, affordable, and kids love them. They also reheat well for meals or lunches.
Cooking is about enjoying the journey and sharing food with loved ones. Don’t stress if your first batch isn’t perfect. They’ll taste great! Each time, you’ll find new flavors and techniques to make them your own.
Begin with the basic recipe and then explore your own flavors. Your kitchen will smell amazing. Your family will ask for these crispy wedges over and over!


