Roasted Butternut Squash with Sage
Welcome to one of my absolute favorite autumn recipes! I’m so excited to share this delicious roasted butternut squash recipe. It’s a staple in my kitchen during cooler months.
The natural sweetness of this golden winter vegetable pairs perfectly with aromatic sage seasoning. Your whole house will smell amazing while it cooks!
Whether you’re planning a cozy family dinner or hosting a holiday gathering, this dish is a top choice. It’s your ticket to effortless entertaining!
I’ll guide you through every step to get perfectly caramelized, tender results. The technique is surprisingly simple. Once you master it, you’ll make this seasonal favorite all autumn long!
Understanding Butternut Squash and Its Perfect Roasting Qualities
Butternut squash is magical when heated in the oven. It turns sweet and gets caramelized edges that are irresistible. It’s a top winter vegetable for roasting, and I’m excited to share why.
What Makes Butternut Squash Ideal for Roasting
Butternut squash is dense and creamy, perfect for roasting. It keeps its shape and gets golden-brown edges.
The natural sugars caramelize, adding deep flavors. Its high starch content makes it tender and buttery. It’s easy to cook for home cooks.
Roasting butternut squash makes the outside crispy and the inside creamy. This mix of textures is great with both savory and sweet dishes.
Nutritional Benefits and Seasonal Availability
Butternut squash is more than tasty. It’s full of vitamin A, vitamin C, fiber, and potassium. These nutrients support vision, immune function, and more.
One cup has over 400% of your daily vitamin A. It’s also high in fiber and potassium. These nutrients aid digestion and heart health.
Butternut squash is best from September to February. It’s perfect for fall and winter meals. Its long storage life means you can enjoy it all winter.
Selecting the Perfect Butternut Squash at the Store
Finding the right butternut squash is simple. Choose one that feels heavy for its size. It should have a matte skin, not shiny.
Avoid squash with soft spots or cuts. The stem should be dry and woody. A tan or beige color means it’s ripe and flavorful.
Tap the squash gently with your knuckles. It should sound hollow. The neck should be firm for the most usable flesh.
Essential Ingredients for Perfect Roasted Butternut Squash with Sage
The secret to roasted butternut squash with sage is choosing the right ingredients. You don’t need a long list to make something amazing! The beauty of this recipe is its simplicity – just a few quality ingredients can turn your squash into a standout side dish.
Great cooking starts with great ingredients. When seasoning vegetables for roasting, every part matters. The right mix brings out sweet flavors and adds complexity to each bite.
Fresh vs. Dried Sage: Making the Right Choice
Fresh sage is my top pick for this recipe! Roasting fresh sage leaves makes them crispy and adds an earthy flavor that pairs well with butternut squash. They also get golden edges that look and feel amazing.
If you only have dried sage, it’s okay. Just use half the amount because dried herbs are stronger. Fresh sage gives a restaurant-quality finish, but dried sage also enhances flavor well.
Oil Selection and Its Impact on Flavor
For olive oil roasting, use good quality extra virgin olive oil. It prevents sticking and helps create that golden caramelization we love. The olive oil’s fruity notes complement the squash’s sweetness perfectly.
Don’t skimp on oil quality – it affects the taste a lot. You’ll need 2-3 tablespoons for a medium squash, enough to coat without being greasy.
Seasoning Essentials: Salt, Pepper, and Beyond
Salt and black pepper are key for seasoning vegetables right. Use 1 teaspoon of kosher salt and ½ teaspoon of black pepper for a medium squash. These basics enhance all the natural flavors!
Garlic powder adds depth – just a pinch does wonders. Some like smoked paprika or a bit of cayenne for warmth. The key is tasting as you go and adjusting to your taste!
Optional Ingredients for Enhanced Flavor
Get creative with flavor enhancement! A drizzle of maple syrup before roasting adds caramelization. Fresh minced garlic cloves (about 2-3) add aromatic depth when roasting with the squash.
I sometimes add red pepper flakes for heat or fresh thyme for herbaceous notes. Balsamic vinegar drizzled on during the last 10 minutes creates a sweet-tangy glaze that’s divine!
The best recipes let natural flavors shine while adding just enough to make them unforgettable.
Preparing Your Butternut Squash for Roasting
Getting your butternut squash ready for roasting is easy! It might seem hard at first, but with the right steps, you’ll be cutting butternut squash like a pro soon. Just take your time and follow some basic safety rules to make it smooth.
Good prep work makes all the difference in roasted squash. When you do it right, you get those perfect caramelized edges and tender centers. It’s what makes the dish so irresistible.
Safe Cutting Techniques for Hard Squash
Kitchen safety is key when working with tough winter squash! Start by placing your squash on a stable cutting board. Use a large, sharp chef’s knife – dull knives are more dangerous because they need more pressure.
Here’s how to do it: Cut off both ends of the squash first. Then, stand the squash upright on one of these flat ends. This makes slicing down through the middle easier.
Keep your fingers curved and away from the blade! Take your time – safety comes first.
Peeling Methods and Essential Tools
You can peel the squash in two ways. A sharp vegetable peeler works well for most people. Just peel in long strokes from top to bottom, rotating the squash as you go.
If you prefer using a knife, a sharp paring knife or chef’s knife is perfect. Follow the squash’s natural curve to remove thin strips of skin. The key is keeping your blade angle consistent for even results.
Optimal Cutting Sizes for Even Cooking
Size consistency is key for perfectly roasted squash! Cut your peeled butternut squash into 1-inch cubes. This size roasts evenly and develops those gorgeous caramelized edges we’re after.
Avoid cutting pieces too small (they’ll dry out) or too large (they won’t cook through properly). Think of dice-sized pieces that will fit comfortably on your fork. This uniform sizing ensures every bite has the same tender texture and golden color.
Removing Seeds and Preparing for Seasoning
Don’t toss those seeds! Scoop them out with a large spoon and set them aside – you can roast them later for a delicious snack. Make sure to remove all the stringy pulp from the seed cavity too.
Once your squash is cut and cleaned, give the pieces a quick rinse under cold water. Then pat them completely dry with paper towels or a clean kitchen towel. This final drying step is key – any excess moisture will prevent proper browning and caramelization in the oven.
Now your butternut squash is perfectly prepped and ready for seasoning and roasting!
Step-by-Step Guide to Making Roasted Butternut Squash with Sage
Now, let’s turn your butternut squash into a golden, caramelized masterpiece! This cooking process is where all your hard work pays off. The right heat and timing will give you those beautiful caramelized edges we all love.
Follow these detailed roasting instructions for restaurant-quality results every time. The key is patience and paying attention to visual cues that tell you when it’s just right!
Oven Temperature and Rack Positioning
Start by preheating your oven to 425°F. This is the sweet spot for butternut squash! It gives you perfect caramelization without burning.
Put your oven rack in the center position. This ensures even heat around your squash pieces. Too high and the tops might burn before the centers cook. Too low and you won’t get that golden color we want!
Make sure your oven is fully preheated before adding your squash. This takes about 15-20 minutes, so plan ahead.
Detailed Roasting Process from Start to Finish
Toss your cubed butternut squash with olive oil, salt, and pepper in a large mixing bowl. Make sure every piece gets coated – this is key for even browning!
Spread the seasoned squash in a single layer on a large baking sheet. Don’t overcrowd them or they’ll steam instead of roast. Use two baking sheets if needed.
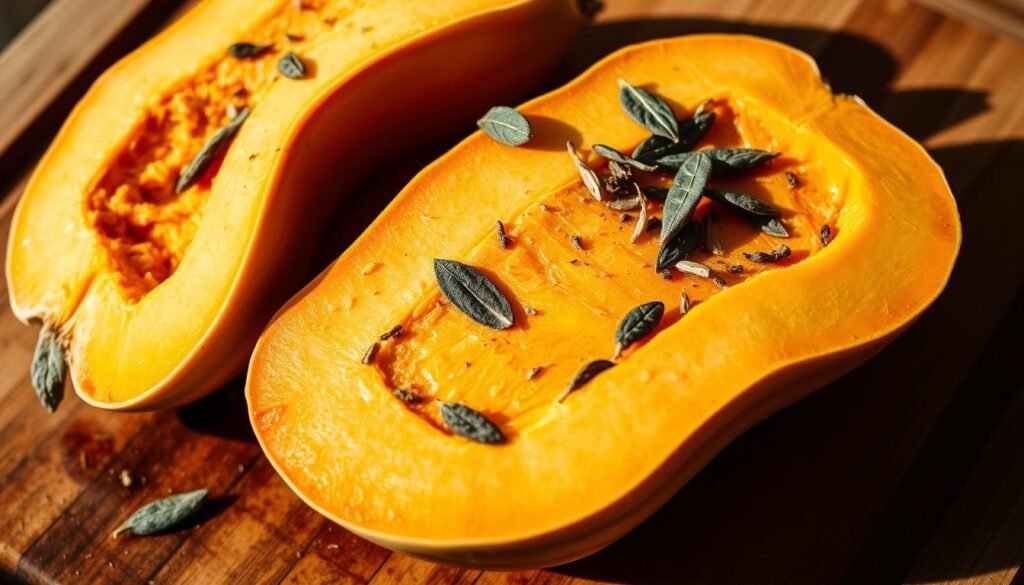
Place the baking sheet in your preheated oven for the initial 20-minute roasting period. During this time, the squash will start developing those beautiful caramelized edges.
The cooking process requires patience, but the results are worth it! You’ll start smelling those amazing roasted aromas after about 15 minutes.
Incorporating Fresh Sage at the Right Time
After 20 minutes of roasting, remove the baking sheet from the oven. This is the perfect moment to add your fresh sage leaves!
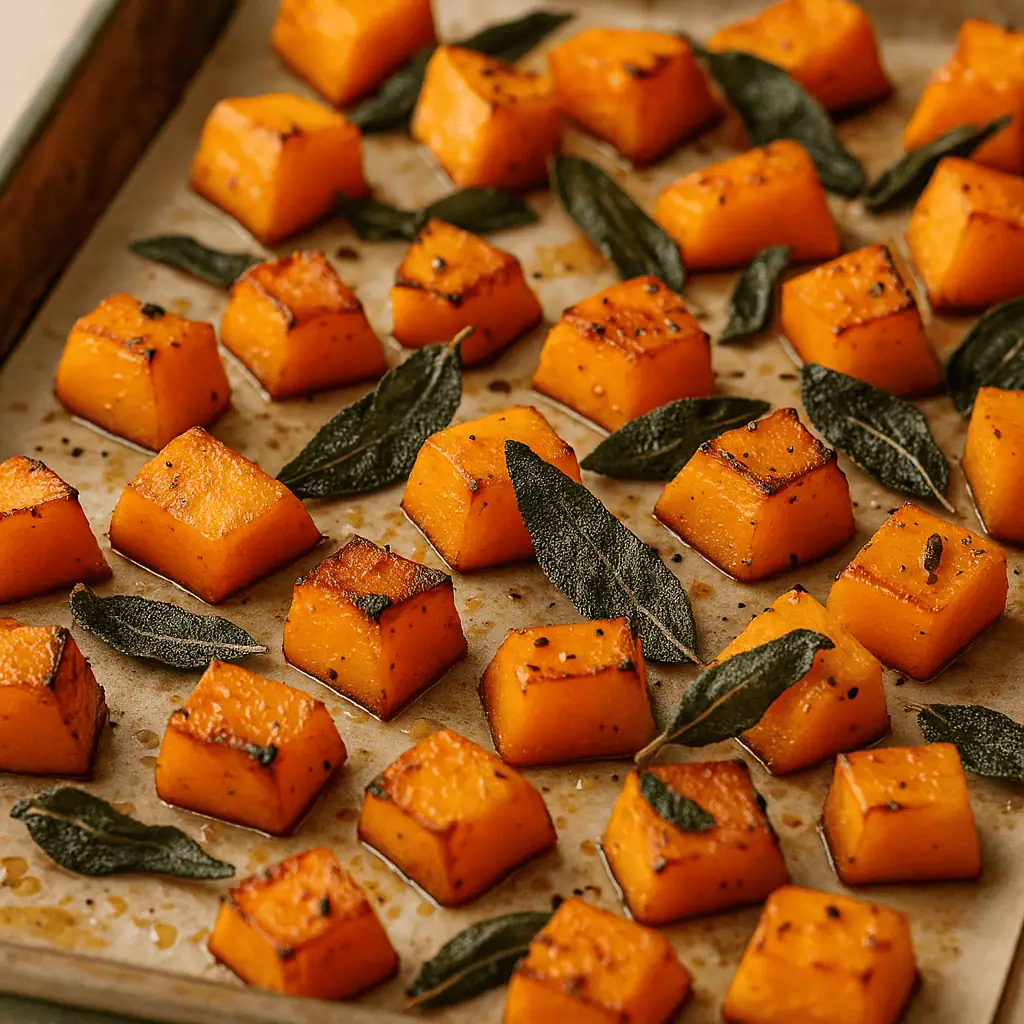
Scatter the sage leaves directly over the partially roasted squash. The leaves will become beautifully crispy and infuse the squash with incredible flavor.
Return the baking sheet to the oven for another 10-15 minutes. The sage will crisp up and release its aromatic oils throughout the remaining cooking time.
Testing for Perfect Doneness and Caramelization
Your butternut squash reaches perfect doneness when the edges are golden brown and caramelized. The pieces should be fork-tender but not mushy.
Test doneness by gently piercing a piece with a fork. It should slide in easily with just a little resistance. The texture should be creamy inside with those gorgeous caramelized edges outside.
| Visual Cue | Texture Test | Cooking Time | What It Means |
|---|---|---|---|
| Golden brown edges | Fork-tender | 30-35 minutes total | Perfect doneness achieved |
| Light browning | Slightly firm | 25-30 minutes total | Needs more time |
| Deep brown/dark | Very soft | 35+ minutes | Slightly overcooked but delicious |
| Pale color | Hard center | Under 25 minutes | Undercooked, continue roasting |
The sage leaves should be crispy and fragrant when your squash is done. If they’re soft, give everything another 2-3 minutes in the oven.
Trust your nose too! When that incredible aroma of caramelized squash and crispy sage fills your kitchen, you know you’ve achieved perfect doneness. The combination of visual cues and that amazing smell will guide you to roasted butternut squash perfection every time!
Timing and Temperature Guidelines for Perfect Results
The secret to restaurant-quality roasted butternut squash is knowing the exact cooking times and when it’s done. These roasting tips will help you get that perfect balance of tender inside and caramelized outside every time.
Getting your timing right depends on how you’ve cut your squash. The size and thickness of your pieces are key!
Roasting Times Based on Cut Size and Thickness
Matching your cooking times to your cut sizes is the key to consistent results. Smaller pieces cook faster, while larger chunks need more time for that perfect caramelization.
Here’s a tried-and-true timing guide for roasting butternut squash. These times work great at 425°F in a standard oven!
| Cut Size | Cooking Time | Best Uses | Texture Result |
|---|---|---|---|
| ½ inch cubes | 20-25 minutes | Salads, grain bowls | Tender with light caramelization |
| 1 inch cubes | 30-35 minutes | Side dishes, soups | Perfect fork-tender texture |
| 1½ inch pieces | 40-45 minutes | Main courses, stuffing | Creamy interior, golden exterior |
| 2 inch wedges | 45-50 minutes | Presentation dishes | Dramatic caramelization |

Visual and Texture Cues for Doneness
Texture testing is the best way to check if your squash is done. A fork should slide in easily, with no resistance.
Look for those golden-brown edges that make your mouth water! The best pieces will have darker, caramelized spots for extra flavor. Trust your nose too – when you smell that sweet, nutty aroma, you’re almost there!
The surface should look slightly wrinkled and concentrated. This means the natural sugars have caramelized beautifully, creating that irresistible sweet and savory combination.
Adjusting Cooking Times for Different Oven Types
Different oven variations need slight adjustments for the same delicious results. Convection ovens cook faster and more evenly because they circulate air better.
For convection ovens, reduce your temperature by 25°F and check for doneness about 5 minutes earlier than the standard times. Gas ovens have more moisture, so you might need an extra 3-5 minutes for proper caramelization.
Every oven is different! I always tell my friends to start checking their squash a few minutes before the recommended time. These roasting tips are guidelines, but your eyes and that amazing aroma are the ultimate judges of perfect doneness.
Serving Suggestions and Pairing Ideas
The golden, caramelized butternut squash with crispy sage leaves offers endless possibilities! It’s perfect for both casual weeknight dinners and fancy holiday feasts. It adds warmth and color to any table.
This side dish makes any meal special. Its sweet, nutty flavors go well with many dishes and cuisines!
Traditional Fall and Winter Meal Pairings
Classic meal pairing combinations are unbeatable in the cooler months! Serve it with roasted chicken, turkey, or pork tenderloin for a complete autumn dinner. The earthy sage complements these hearty proteins well.
Beef lovers will enjoy it with a simple roast or grilled steaks. The sweetness of the squash balances the rich flavors. Duck and lamb work wonderfully too – the sage bridges the flavors between the squash and these meats.
Holiday Menu Integration and Presentation
This dish is a top choice for holiday sides! It’s a staple on my Thanksgiving and Christmas menus. Your guests will ask for the recipe, I promise!
For stunning holiday presentation, put the squash on your most beautiful platter. The vibrant orange color looks stunning against white or cream-colored dishes. Those crispy sage leaves make the perfect natural garnish – they’re delicious and beautiful!
Consider it for Easter brunch or New Year’s dinner. It’s great as a side dish or a stunning centerpiece that guests will remember.
Vegetarian and Vegan Serving Options
Vegetarian friends love this dish! Serve it over quinoa pilaf, wild rice, or with hearty lentil dishes for complete protein combinations. It’s also amazing in grain bowls and fresh salads.
Try it with roasted chickpeas, stuffed portobello mushrooms, or vegetarian lasagna. The possibilities are endless! Presentation ideas for vegetarian meals include serving it family-style in rustic wooden bowls or individual ramekins for elegant plating.
Garnishing Techniques and Plating Tips
Professional-looking presentation ideas start with the right garnishes! Sprinkle toasted pine nuts or pumpkin seeds on top for extra crunch and visual appeal. A light drizzle of balsamic glaze adds flavor and elegance.
Fresh herbs like parsley or thyme add beautiful color contrast against the orange squash. Don’t forget those crispy sage leaves from cooking – they’re your secret weapon for gorgeous plating!
For family-style serving suggestions, use a large, shallow serving bowl that shows off the beautiful caramelized edges. Individual portions look stunning in small cast-iron skillets or ceramic ramekins for more formal occasions.
Storage, Reheating, and Meal Prep Strategies
This roasted butternut squash recipe is a meal prep champion! It makes your weekly cooking routine easier. Proper planning makes weeknight dinners a breeze.
Smart food storage keeps your squash fresh for days. Let it cool completely before storing. This prevents it from getting soggy.
Proper Storage Techniques for Maximum Freshness
Once cooled, store the squash in airtight containers. Glass containers with tight lids work best. It stays fresh in the fridge for up to four days.
Freezing is great for longer storage. Spread the squash on a baking sheet and freeze for two hours. Then, put it in freezer bags. This prevents clumping and makes portioning easier.
Freezer storage keeps the squash good for up to three months. Label containers with dates. You’ll be glad to find these treasures in your freezer!
Best Reheating Methods to Maintain Texture
The secret to perfect reheating tips is choosing the right method. I prefer the oven for the best texture. Preheat to 350°F and spread the squash on a baking sheet.
Oven reheating takes about 10-12 minutes. It preserves the caramelized exterior. Cover with foil if it browns too quickly. This keeps the squash tender and crisp.
Microwave reheating is quick when you’re short on time. Use 30-second intervals and stir between each round. Add water if it’s dry. This method won’t keep the texture as crisp.
Make-Ahead Preparation and Batch Cooking
Batch cooking makes your Sunday easier for the week. I often double or triple the recipe. This saves time during busy weekdays.
You can prep everything ahead of time too. Cut and season the squash, then store it for up to two days. Add extra minutes when cooking from cold.
Use prepped squash in grain bowls, salads, or as quick side dishes. It’s great in pasta, soups, and breakfast hash. The possibilities are endless with this meal prep staple!
Creative Variations and Flavor Enhancements
Make your roasted butternut squash into something new with these recipe variations and twists! The basic recipe is just the start. I love mixing different flavor combinations because butternut squash goes well with sweet and savory.
Want a dessert-like side dish or international dinner flair? These variations will make your family excited about this healthy veggie. Let’s dive into some of my top ways to spice up this classic recipe!
Sweet Variations with Maple Syrup and Cinnamon
For a dessert twist, try these sweet recipe variations that highlight butternut squash’s sweetness! Drizzle pure maple syrup over cubed squash before roasting. Then, sprinkle with cinnamon and a pinch of nutmeg.
Adding a tablespoon of brown butter also enriches it. The oven caramelization creates amazing flavor combinations! Toss in dried cranberries or chopped pecans for the last five minutes for texture.
My honey-vanilla version is another favorite. Mix two tablespoons of honey with a teaspoon of vanilla extract, then drizzle over the squash. It’s like having dessert as a side!
Savory Additions: Garlic, Thyme, and Rosemary
Savory herbs turn butternut squash into a sophisticated side dish. Fresh thyme and rosemary are perfect because they complement the squash’s earthy sweetness.
Mince three to four garlic cloves and toss with cubed squash and fresh herbs. The garlic becomes sweet and mellow during roasting, adding depth. Sometimes, I add a splash of balsamic vinegar in the last ten minutes for a tangy finish.
For a Mediterranean twist, add crumbled feta cheese and toasted pine nuts after roasting. The salty cheese contrasts beautifully with the sweet squash!
International Flavor Profiles and Spice Blends
Explore the world with these exciting international spice blends! Each blend creates unique flavor combinations that will surprise and delight your guests.
My Indian-inspired version uses curry powder, turmeric, and a pinch of cayenne pepper. The warm spices create an aromatic dish that pairs well with rice or naan bread. For a Middle Eastern flair, combine cumin, paprika, and sumac with pomegranate molasses.
“Spices are the soul of cooking – they transform simple ingredients into extraordinary experiences.”
Mexican-inspired squash features chili powder, cumin, and lime zest. Finish with fresh cilantro and a squeeze of lime juice for brightness. The smoky heat balances the squash’s natural sweetness perfectly!
| Flavor Profile | Key Spices | Finishing Touch | Best Pairing |
|---|---|---|---|
| Indian | Curry powder, turmeric, cayenne | Fresh cilantro | Basmati rice |
| Middle Eastern | Cumin, paprika, sumac | Pomegranate seeds | Quinoa pilaf |
| Mexican | Chili powder, cumin, lime zest | Lime juice, cilantro | Black beans |
| Moroccan | Cinnamon, ginger, allspice | Toasted almonds | Couscous |
Alternative Cooking Methods and Texture Variations
While oven roasting is classic, different cooking methods offer unique textures and flavors. Grilling butternut squash in a grill basket adds smoky notes that complement sage beautifully.
For grilling, cut your squash into larger wedges and brush with oil. Cook over medium heat for 15-20 minutes, turning once. The slight char adds incredible depth to the flavor combinations.
Air frying is another great option that creates crispy edges while keeping the interior tender. Cook cubed squash at 400°F for 12-15 minutes, shaking the basket halfway through. This method works well with sweet variations!
Try cutting your squash into different shapes too! Thin slices create crispy chips, while thick wedges offer a more substantial bite. Each shape requires slight timing adjustments, but the variety keeps meals interesting.
Conclusion
You now have everything you need to make this amazing roasted butternut squash with sage! This recipe is a true gem among easy fall recipes. It brings warmth and comfort to any table.
Seasonal cooking is all about simplicity. By mixing fresh butternut squash with aromatic sage, you create something special. Your kitchen will smell incredible, and your family will love it!
This side dish is perfect for cozy weeknight dinners or holiday gatherings. Its golden, caramelized edges and tender interior make it a hit every time.
Don’t stress if it’s not perfect the first time. Cooking should be joyful, not stressful! Each time you make this recipe, you’ll find new ways to make it your own. Try different seasonings or pair it with your favorite proteins.
I love hearing how recipes turn out in different kitchens. Your version might even be better than the original! The most important thing is enjoying the process and sharing delicious food with loved ones.
Happy cooking, and here’s to many wonderful meals filled with the flavors of fall!

