Kiwi Turtles – The Cutest Chocolate-Dipped Snack You’ll Ever Make 🐢🍫
Save this one—because fruit has never looked this fun.
Forget basic fruit salads—these Kiwi Turtles are here to steal the show. With just a few ingredients, you can turn kiwi slices into adorable, chocolate-dipped “turtles” with candy eyes and a glossy shell. They’re playful, sweet, and just a little fancy in the best way.
Whether you’re prepping a healthy snack tray, entertaining little hands, or just feeling a little extra in the kitchen today—this one’s for you.
Why You’ll Love This Recipe
✨ Naturally sweet with just a touch of chocolate
✨ So cute they’ll steal the show at any snack table
✨ Kid-friendly, adult-approved
✨ No baking, no stress
✨ Easy to customize (try strawberries, oranges, or apple slices too!)
🛒 What You’ll Need
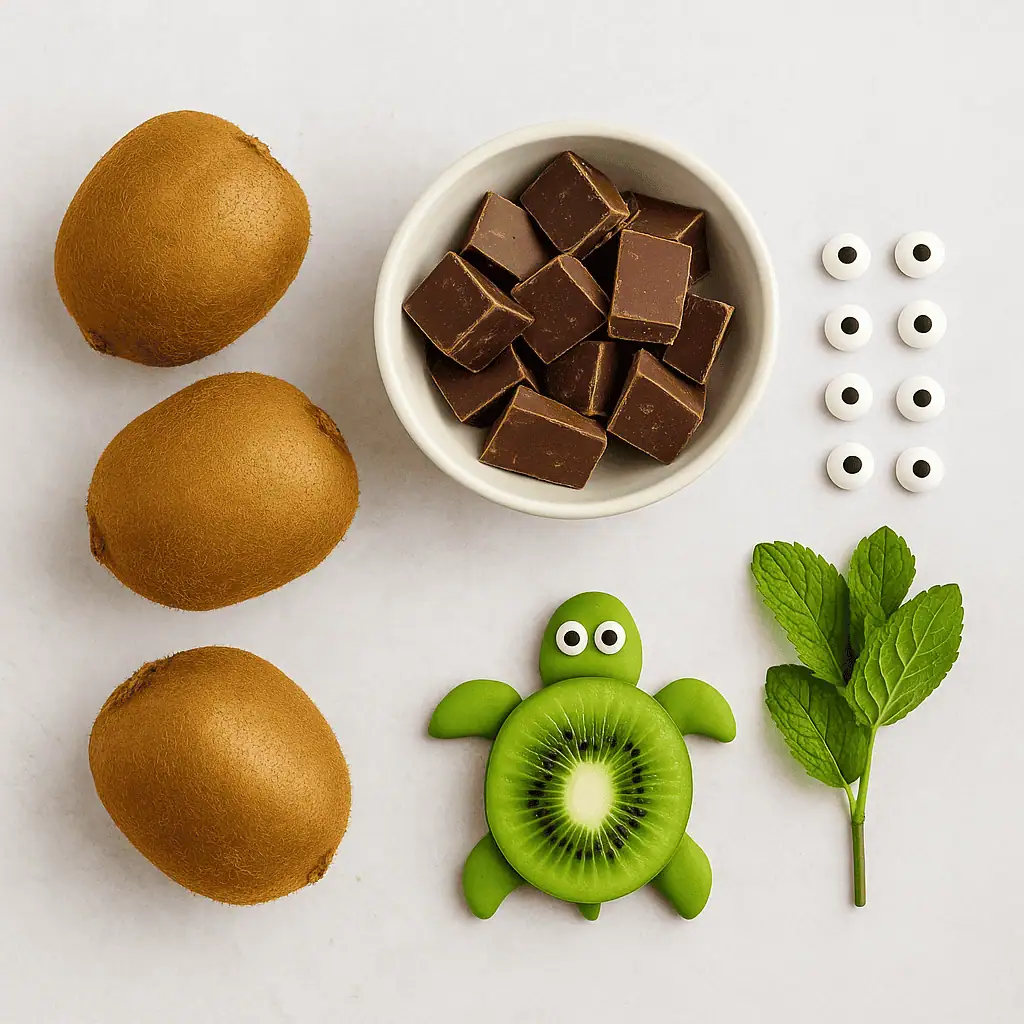
Ingredients
- 2 kiwis
- 3 oz dark chocolate
- 12 sugar eyes
- A few mint leaves (for garnish)
Tools
- Sharp knife
- Baking paper
- Pastry syringe or piping bag
- Microwave-safe bowl or double boiler
- Towel or paper towel
- Optional: shot glass or small circle cutter
👩🍳 How to Make Kiwi Turtles
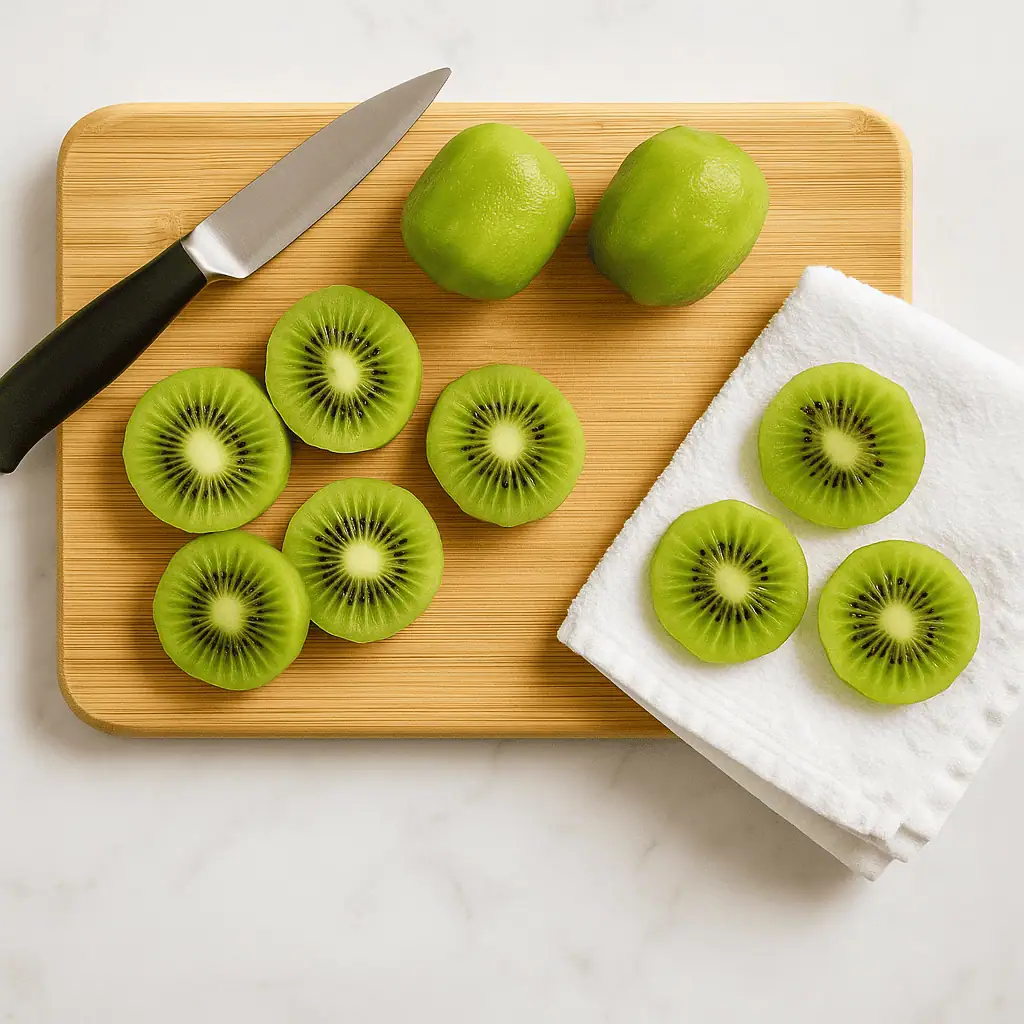
1️⃣ Slice & prep the kiwi.
Peel the kiwis and slice them into 6 even circles. Pat them dry with a clean towel to remove any moisture.
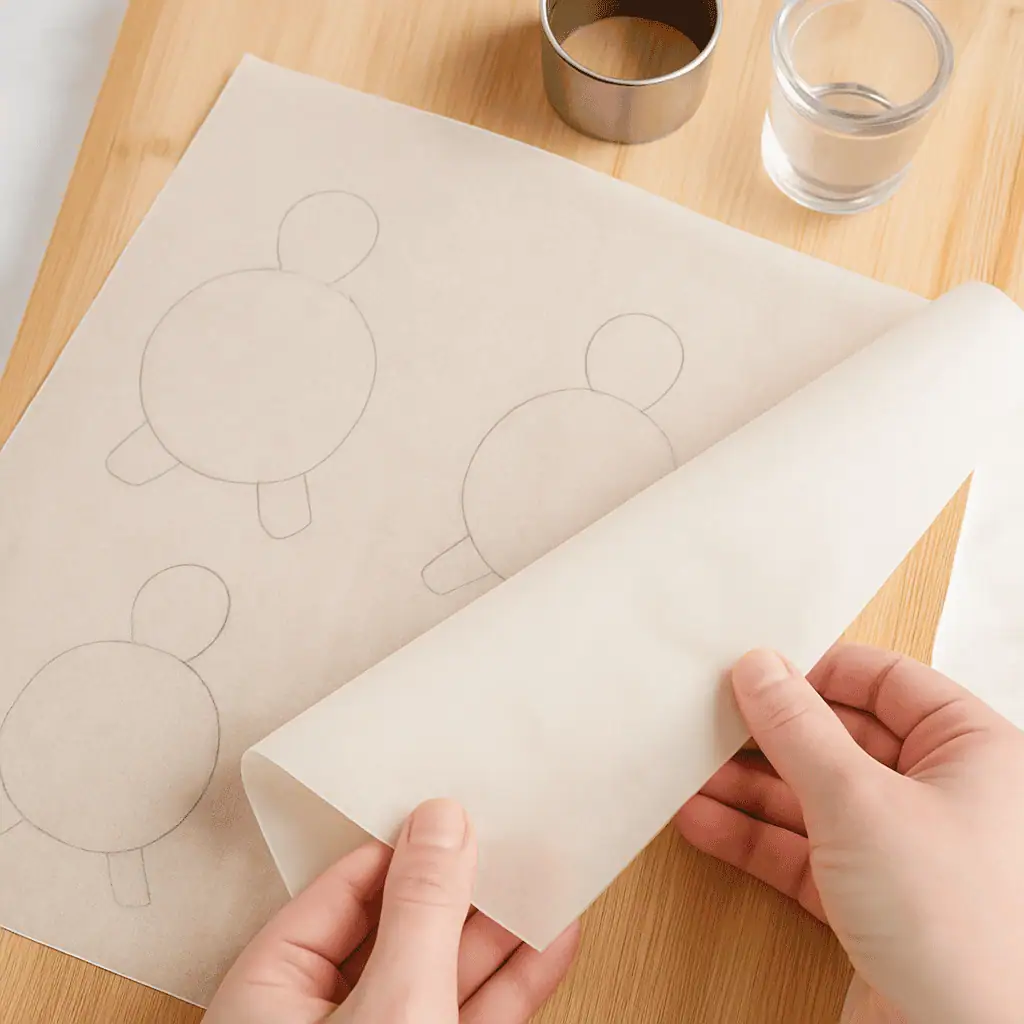
2️⃣ Sketch & prep your turtle shapes.
Trace a turtle shell outline on parchment paper using household items (a 3-inch and 1-inch circle—cookie cutters or shot glasses work great). Flip the paper over and place it on a tray.
3️⃣ Melt the chocolate.
Use the microwave (30-second bursts at 350W) or a water bath to gently melt your chocolate until smooth.

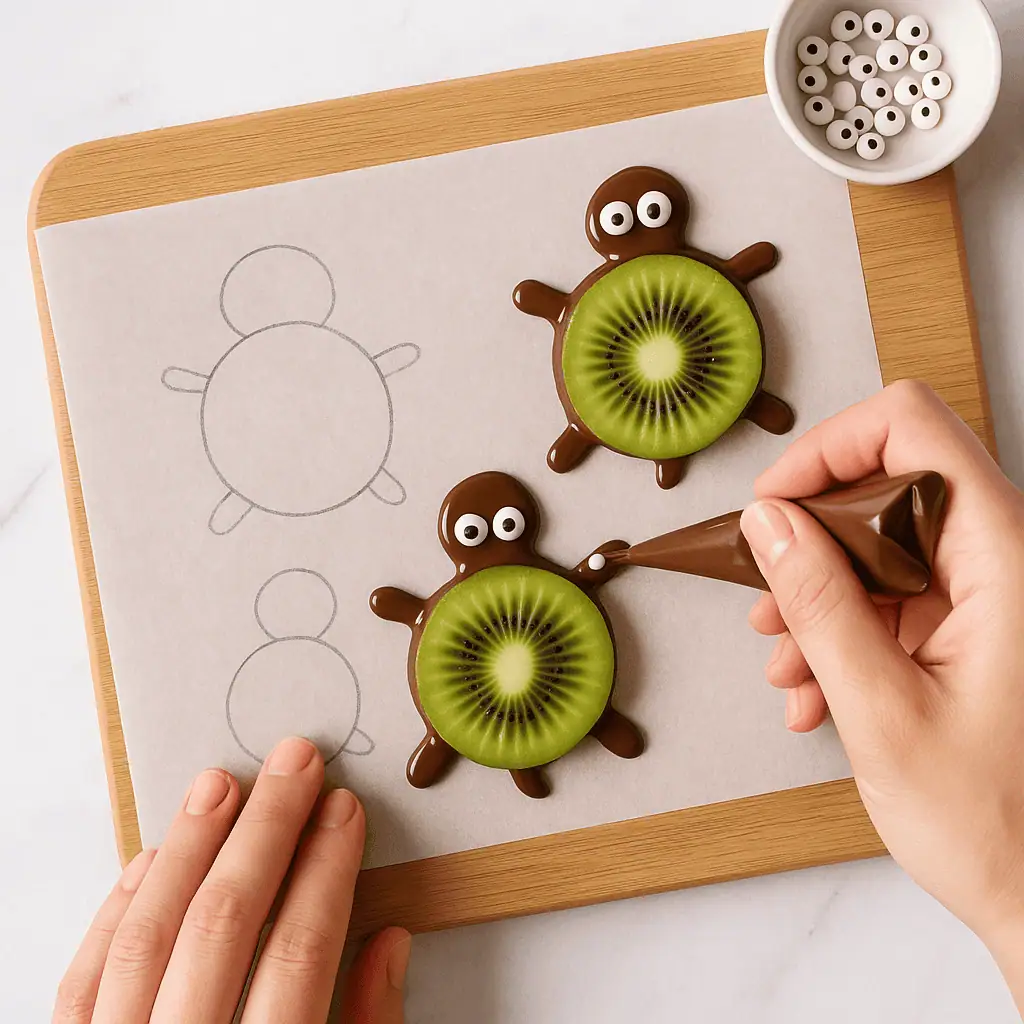
4️⃣ Pipe the turtle shapes.
Use a pastry syringe or piping bag to outline each turtle with chocolate—body, head, and tail. While the chocolate is still soft, gently press on a kiwi slice as the “shell” and stick two sugar eyes onto the head.
5️⃣ Chill & set.
Refrigerate for 15–20 minutes until the chocolate firms up. Add mint leaves as garnish for a fresh, pretty finish. Serve chilled!

💡 Pro Tips
- Make sure the kiwi is dry—excess moisture can prevent the chocolate from sticking.
- Let kids help press on the kiwi shells and eyes. It’s half snack, half craft.
- Try swapping in other fruits for a fun twist:
- 🍓 Strawberries = berry turtles
- 🍊 Oranges = citrus turtles
- 🍏 Apples = crunchy turtles
🎈 A Little Story Behind These…
I made these on a whim after seeing one too many boring fruit trays at kids’ parties. I wanted something healthier—but still fun enough to catch attention. Let’s just say these little guys were the first thing gone from the snack table. They’re sweet, simple, and surprisingly satisfying.
Now I make them for school parties, spring brunches, or whenever I want something special without turning on the oven. Once you make one batch, you’ll want to turtle-fy everything.

Kiwi Turtles (Adorable Chocolate-Dipped Fruit Snack)
Ingredients
Equipment
Method
- Prep the kiwi. Peel and slice the kiwis into 6 even rounds. Lay them on a towel and gently press with another towel to remove moisture.
- Sketch turtle outlines. On parchment paper, trace a 3-inch circle (for body) and a 1-inch circle (for the head) using kitchen items like a cookie cutter or shot glass. Flip the paper over and place it on a tray.
- Melt the chocolate. Use a microwave (30-second pulses at 350W) or a double boiler. Stir until smooth and shiny.
- Pipe the shapes. With a piping bag or syringe, outline each turtle’s body, head, and tail in chocolate. Press one kiwi slice on top as the shell, and stick on two sugar eyes.
- Chill & set. Place in the fridge for 15–20 minutes until the chocolate is firm. Add mint leaves and serve on a chilled plate.
Notes
- Keep kiwi slices dry for better chocolate adhesion.
- You can also make these with sliced strawberries, apples, or orange rounds.
- Try white or milk chocolate for color and flavor variation.
- Store leftovers in the fridge and eat within 24 hours for best texture.
Estimated Calories:
80 per turtleAn automated tool is used to calculate nutritional information. Accuracy not guaranteed.