Herbed Whole Wheat Rolls
Welcome to the amazing world of homemade dinner rolls! I’m excited to share this fantastic recipe with you today. These rolls are soft, fragrant, and full of wholesome goodness.
Whether you’re having a cozy family dinner or hosting friends, these rolls will impress everyone! The nutty flavor of whole grain flour mixes well with fresh herbs. Your kitchen will smell amazing while they bake.
I’ve been working on this whole wheat bread recipe for years. I’m excited to show you how to make bakery-quality rolls at home. Trust me, once you try these herbed whole wheat rolls, you’ll never buy store-bought again!
The mix of aromatic herbs and nutritious flour gives a flavor that’s both comforting and sophisticated. Let’s start this delicious baking adventure together!
Why Choose Whole Wheat for Your Dinner Rolls
Whole wheat flour changes how you think about homemade dinner rolls! Making this simple swap brings nutritional benefits and amazing flavor. Your family will ask for seconds!
You’re not just baking bread. You’re making healthy dinner rolls that nourish and satisfy!
Nutritional Benefits of Whole Wheat Flour
The whole wheat flour benefits are amazing! Unlike refined white flour, whole wheat keeps all three parts of the grain intact. This means you’re getting fiber for digestion, protein for energy, and B vitamins for metabolism.
You’ll also find important minerals like iron, magnesium, and zinc. These nutrients support your immune system and keep you energized all day!
| Nutrient | Whole Wheat Flour | White Flour | Health Impact |
|---|---|---|---|
| Fiber | 12.2g per cup | 3.4g per cup | Better digestion |
| Protein | 16g per cup | 12g per cup | Sustained energy |
| Iron | 4.7mg per cup | 5.8mg per cup | Oxygen transport |
| B Vitamins | High levels | Minimal | Metabolism support |
Flavor Profile and Texture Advantages
What I love most about nutritious bread making with whole wheat is the flavor. It’s nutty and slightly sweet, perfect with fresh herbs. The texture is tender yet substantial.
These rolls are great with butter and jam. They’re soft inside and have a pillowy texture. The herbs add a complex aroma to every bite.
Perfect Occasions for Herbed Rolls
These healthy dinner rolls are perfect for holidays, family dinners, and weeknight meals. They’re elegant for Thanksgiving and cozy for soup night. They’re a hit at potluck dinners!
Essential Ingredients for Perfect Results
Let’s explore the key bread making ingredients that turn your kitchen into a bakery! Each part is vital for making those soft, tasty rolls you’ve been wanting. I’m thrilled to share these tips with you!
Choosing the Right Whole Wheat Flour
White whole wheat flour is my top pick for these rolls! It offers the health benefits of whole wheat but tastes milder. This is great for beginners who want healthy rolls without a heavy texture.
King Arthur and Bob’s Red Mill make excellent white whole wheat flour. Look for finely ground, fresh flour. Always check the expiration date because whole wheat flour can go rancid quickly!
Fresh vs. Dried Herbs Selection
Fresh rosemary, thyme, and sage add amazing flavor to these rolls! The oils in fresh herbs for baking bring deep flavor. But dried herbs work well too.
Here’s a simple rule for using herbs:
- Use 1 tablespoon fresh herbs for every 1 teaspoon dried
- Chop fresh herbs finely for even distribution
- Crush dried herbs between your fingers to release oils
Yeast Types and Activation
Active dry yeast is my top choice for its reliability. Make sure it’s not expired – I learned this the hard way when my rolls didn’t rise!
Test your yeast by mixing it with warm water (around 110°F) and a bit of honey. It should foam in 5-10 minutes. No foam means it’s dead, and you need new yeast.
Supporting Ingredients and Their Roles
Every supporting ingredient has a special role in your bread making ingredients. Extra virgin olive oil keeps the rolls soft and adds richness. Honey feeds the yeast and adds sweetness that complements the herbs.
Sea salt brings out all the flavors – don’t skip it! The water should feel warm on your wrist, like testing a baby’s bottle. Quality ingredients truly make all the difference – you can taste the love in every bite!
Kitchen Equipment and Tools You’ll Need
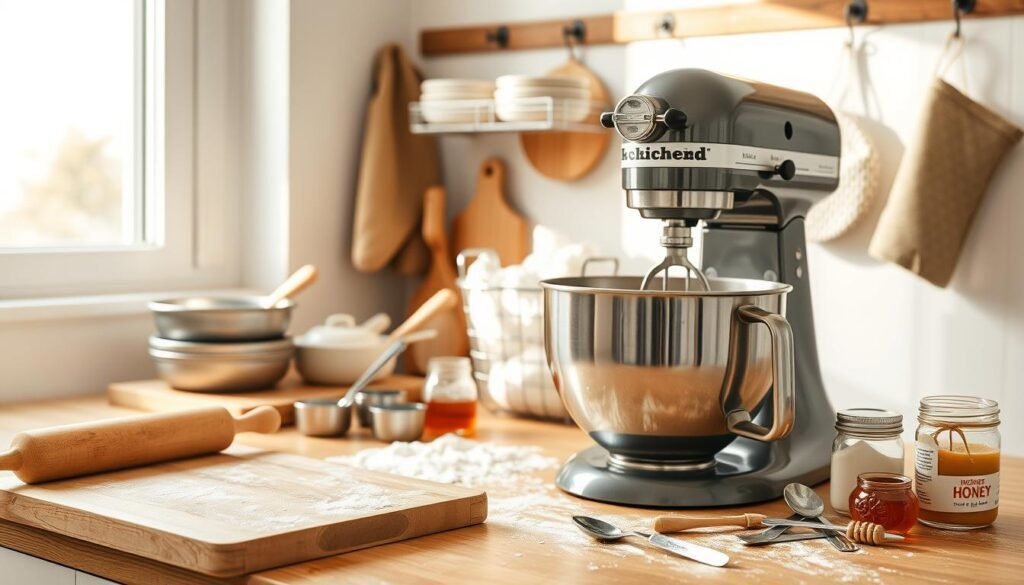
The right bread making tools can make baking fun! You don’t need fancy gadgets or expensive stuff to make great herbed whole wheat rolls. Here are the key items for a smooth baking journey.
Mixing and Kneading Equipment
A large mixing bowl is key – glass or ceramic is best because they don’t hold flavors. A stand mixer with a dough hook is great, but mixing by hand is also good. It lets you control the dough’s texture better.
For kneading, a clean countertop or large cutting board works well. A bench scraper is handy for moving dough, but it’s not necessary.

Measuring Tools for Accuracy
Getting measurements right is key to baking success! Good measuring cups for baking and spoons are must-haves. A kitchen scale is great for precision, but standard tools work too.
Don’t forget a liquid measuring cup for wet ingredients. It makes pouring easier!
Baking Essentials
You’ll need clean kitchen towels for covering dough and a 9×13 inch baking pan or two round cake pans. A pastry brush is good for egg wash, but a spoon will do in a pinch!
Parchment paper makes cleanup easy. The most important kitchen equipment for baking? Your hands! They’ll tell you if the dough is ready.
| Essential Tool | Purpose | Alternative Option |
|---|---|---|
| Large mixing bowl | Combining ingredients | Any large bowl |
| Measuring cups | Accurate portions | Kitchen scale |
| Clean towels | Covering dough | Plastic wrap |
| Baking pan | Shaping and baking | Cookie sheet |
Preparing Your Ingredients and Workspace
Getting your ingredients and workspace ready is where the magic begins! It’s all about having everything organized and at the right temperature. This step is what makes a good baker into a great one!
Ingredient Temperature and Timing
Temperature control is key for baking success. Your water should be warm, like 110°F. It’s like the perfect bath temperature!
Water that’s too hot can kill your yeast. Water that’s too cold won’t activate it well. Take eggs and dairy out of the fridge 30 minutes before baking.
Room temperature ingredients mix better. They make a dough that rises beautifully!

Herb Preparation Techniques
Fresh herbs need special care. Rinse them gently and pat them dry with paper towels. Wet herbs can make your dough sticky.
Be careful when removing thyme stems. Chop rosemary leaves finely because they can be tough. Dried herbs need a different approach. Rub them between your palms to release their oils and aromas.
Setting Up for Success
A well-set kitchen workspace is essential. Clear a large area for kneading. Have all your ingredients measured and ready.
Find a warm, draft-free spot for your dough to rise. I use my oven with just the light on for a cozy spot. Preparing everything ahead of time makes baking enjoyable and stress-free.
Trust me, future you will thank present you for this preparation step!
Step-by-Step Mixing and Kneading Process
Get ready to turn simple ingredients into beautiful, aromatic dough. This is where the magic happens. Your herbed whole wheat rolls start their journey here.
Creating the Perfect Dough Base
Start your bread dough mixing adventure by dissolving yeast in warm water with honey. Watch for those lovely bubbles to form. It’s like a mini science experiment in your kitchen! This process usually takes about 5-10 minutes.
You’ll know your yeast is ready when it gets wonderfully foamy and smells deliciously yeasty. In your large mixing bowl, combine the whole wheat flour and salt, keeping them on opposite sides initially. Salt can inhibit yeast if they meet too early!
Make a well in the center of your flour mixture. Pour in your bubbly yeast mixture, olive oil, and remaining honey. Now comes the fun part – start with a wooden spoon or clean hands, bringing the flour into the wet ingredients gradually.
Incorporating Herbs Evenly
The dough will look shaggy at first – don’t worry, that’s totally normal! Once it starts coming together, it’s time to add those gorgeous herbs. Sprinkle your chosen herbs evenly over the dough surface.
Gently fold the herbs into the mixture using a light touch. This ensures even distribution without bruising the delicate herb leaves. Even herb incorporation is key to getting consistent flavor in every bite!
Kneading Techniques for Whole Wheat
Turn your dough onto a clean surface and start working those kneading techniques! Whole wheat dough needs more love than white flour dough, so be patient with the process.
Push the dough away from you with the heel of your hand. Fold it back over itself, give it a quarter turn, and repeat. The rhythm becomes almost meditative after a few minutes!
After about 8-10 minutes of kneading, your dough should feel smooth and slightly elastic. Don’t be tempted to add too much extra flour – a slightly sticky dough makes for tender rolls.
Testing Dough Consistency
Here’s my favorite test for perfect yeast dough consistency: poke the dough gently with your finger. If it springs back slowly, you’ve achieved the ideal texture!
The dough might feel denser than white bread dough, and that’s perfectly normal for whole wheat. Trust the process – your patience will be rewarded with incredibly flavorful, nutritious rolls that’ll have everyone asking for your secret!
Mastering the Rising and Shaping Techniques
This is where the magic happens – your dough is about to become soft and fluffy! The rising process needs patience, but it’s worth it. These bread rising techniques will help you get beautiful results every time.
First Rise Timing and Environment
Put your dough in a lightly oiled bowl. I like using olive oil for this. Turn the dough to coat all sides, then cover it with a damp towel or plastic wrap. Find a warm spot in your kitchen for the best yeast dough proofing.
The first rise takes 1 to 1.5 hours. But don’t check the clock too often. Watch the dough instead! It should double in size and feel light when you poke it. This means the yeast has worked its magic.
While waiting, prepare your baking pan with oil or butter. This prevents sticking and makes cleaning up easier!
Shaping Individual Rolls
Now it’s time for the fun part – shaping dinner rolls! Gently punch down the dough and turn it onto a floured surface. Divide it into 12 to 15 pieces using a bench scraper.
My favorite shaping method is to stretch each piece down and under. This creates tension for smooth tops. Place them in your prepared pan, leaving a little space between each roll.
“The secret to perfect dinner rolls lies in gentle handling and patient rising – never rush the process.”
Second Rise for Optimal Texture
Cover your shaped rolls and let them rise for 45 minutes to an hour. They’re ready when they look soft and spring back slowly. This second rise is crucial for the perfect texture!
I know it’s hard to wait, but it’s worth it. The anticipation makes the first bite even better! Your kitchen will smell amazing from the herbs. These bread rising techniques ensure your rolls will be tender, flavorful, and irresistible.
Baking Your Herbed Whole Wheat Rolls to Perfection
Your kitchen will soon be filled with an amazing smell. This step turns your hard work into warm, golden treasures. Everyone will want to be at your table.
Oven Preparation and Temperature
First, heat your oven to 375°F about 15 minutes before baking. This makes sure it’s ready for your rolls. If you have a baking stone, put it in the oven to get crispy bottoms.
Just before baking, brush the rolls with egg and water. This gives them a shiny top. You can also sprinkle coarse sea salt or extra herbs on top for a fancy look.
Baking Time and Visual Cues
Set your timer for 18-20 minutes. Look for golden brown rolls with a crisp outside. The smell will be amazing, with toasted wheat and fresh herbs.
If the tops get too brown, cover them with foil for a few minutes. This stops over-browning and makes sure they’re cooked inside.
Testing for Doneness
To check if they’re done, tap the bottom of a roll carefully. It should sound hollow. You can also use a thermometer to check for 190°F, but the sound test works great too!
Let them cool for 5-10 minutes before serving. This makes the inside set while keeping them warm. The wait is hard, but it’s worth it for that first bite!
Troubleshooting Common Issues and Storage Tips
Making perfect herbed whole wheat rolls takes practice, but common issues have simple solutions! I’ve been there – staring at dense rolls or uneven rises and wondering what went wrong. The good news is that bread troubleshooting becomes easier once you know what to look for.
Dense or Heavy Rolls Solutions
If your rolls turned out heavy or dense, don’t get discouraged! This usually happens for three main reasons. First, check your yeast’s expiration date – old yeast won’t give you the lift you need.
Second, water temperature matters more than you think. Too hot kills the yeast, while too cold won’t activate it properly. Aim for that perfect lukewarm feel on your wrist.
Lastly, resist adding too much flour during kneading. Whole wheat naturally creates a denser texture than white flour, but your rolls should feel tender and light.
Uneven Rising Problems
Uneven rising drives me crazy too! This typically happens when your rising environment has drafts or temperature changes. Try that oven-with-light-on trick I mentioned earlier – it creates the perfect consistent warmth.
Sometimes the culprit is uneven shaping. When dividing your dough, aim for uniform pieces and shape each roll with the same technique. Consistency is key!
Proper Storage Methods
Storing homemade rolls properly keeps them fresh and delicious! Once completely cooled, place them in an airtight container or plastic bag at room temperature for up to three days.
For longer storage, wrap each roll individually in plastic wrap and freeze for up to three months. They freeze beautifully and taste amazing when properly reheated!
Reheating and Refreshing
Reheating dinner rolls is an art form! For room-temperature rolls, wrap them in a damp paper towel and microwave for 15-20 seconds. Or, warm them in a 350°F oven for 5-7 minutes.
Frozen rolls can go straight from freezer to oven – just add a few extra minutes! Here’s my favorite trick: if day-old rolls seem dry, brush them lightly with melted butter before warming. They’ll taste freshly baked again!
I love making double batches and freezing half for busy weeknights. There’s something magical about pulling homemade rolls from the freezer when unexpected guests arrive!
Your Herbed Whole Wheat Roll Journey Ends Here
You’ve just finished an incredible whole wheat baking journey! These fragrant herbed rolls are more than just bread. They’re your key to homemade bread success, filling your kitchen with amazing smells.
Through this recipe, you’ve learned valuable skills. Your artisan dinner rolls perfectly mix nutty whole wheat flour with fresh herbs. This skill lets you try new herb mixes, add garlic or seeds, and even create your own special rolls.
Whole wheat baking might seem tough at first, but you’ve shown it’s doable! The joy of kneading dough, seeing it rise, and baking golden rolls is unforgettable. These moments create lasting memories.
These rolls are perfect for any occasion, from holiday gatherings to cozy family dinners. Sharing them with friends and family brings joy. There’s nothing like giving someone a warm, homemade roll straight from your oven.
Your baking journey is far from over. Every time you make these rolls, you’ll learn something new and find your own style. The confidence you’ve gained lets you try other bread recipes and grow your homemade collection.
Keep trying new things, keep baking, and most importantly, enjoy every delicious bite of your beautiful herbed whole wheat rolls!


