Air Fryer Zombie Finger Breadsticks: A Spooky Snack
Get ready to make the most deliciously creepy Halloween treat that’ll make your guests scream for more! I’m excited to share this fun recipe with you. It’s one of those magical dishes that brings out the kid in everyone.
These spooky snacks are easy to make, and the reactions from your party guests will be priceless!
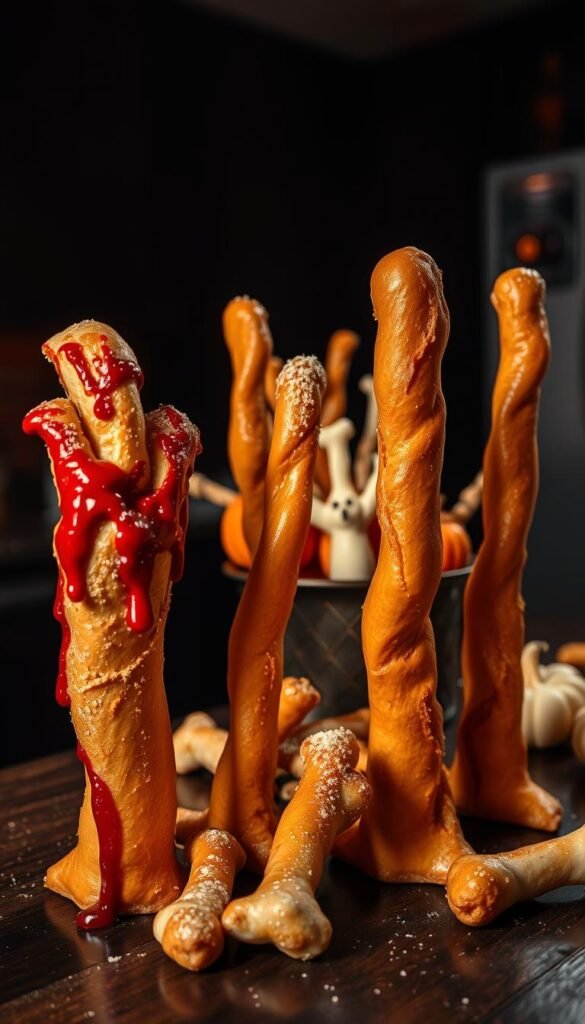
We’re talking crispy golden treats shaped like gnarly appendages. They come with almond “fingernails” and are served with blood-red marinara sauce for dipping. These Halloween breadsticks look terrifying but taste amazing!
The perfect mix of spooky and scrumptious will make your party unforgettable.
This recipe turns ordinary dough into something wonderfully wicked. Your kitchen becomes a haunted bakery where delicious meets disgusting in the best way. It’s Halloween entertaining made simple and unforgettable!
What Makes These Breadsticks Perfect for Halloween
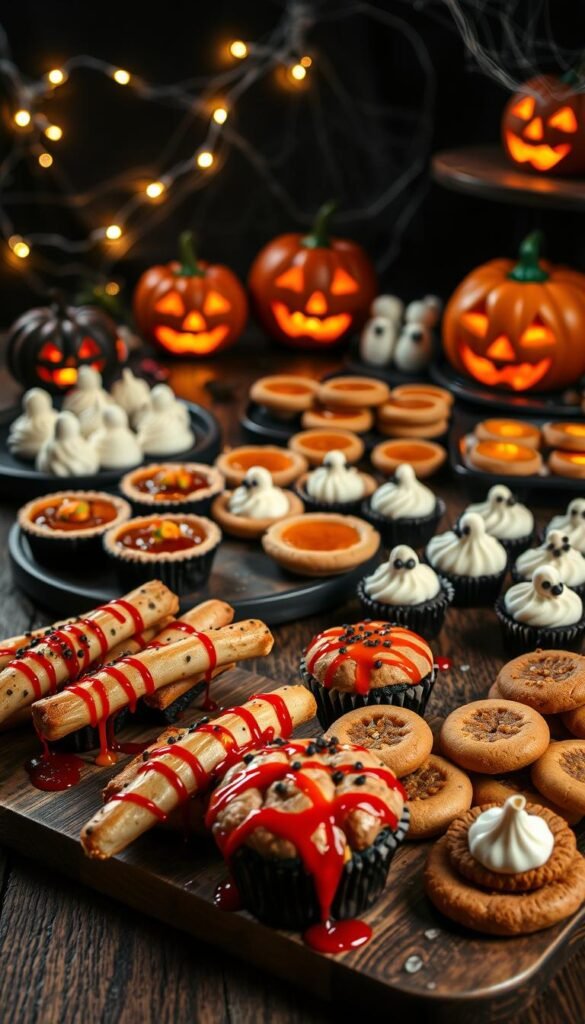
These zombie finger breadsticks make your Halloween spread unforgettable. They turn your party table into a conversation starter that gets everyone laughing and taking photos.
What I love most about these spooky snacks is how versatile they are. They’re great as:
- Halloween party appetizers
- Fun dinner side dishes
- Interactive snacks for kids
- Photo-worthy social media treats
They’re a perfect mix of creepy and delicious. They look spooky but taste like garlic breadsticks. Your guests will love the realistic finger appearance and the flavor.
The air fryer makes them crispy on the outside and soft inside. Plus, they’re budget-friendly. You might already have most ingredients at home!
These breadsticks are great for making with kids. They’ll enjoy shaping the “fingers” and adding spooky details. Dipping them in “blood” sauce adds to the fun.
Best of all, they’re quick to make. You won’t miss your own party. They’re customizable for different diets, making them the ultimate crowd-pleasing treat for Halloween.
Essential Ingredients for Zombie Finger Breadsticks
I’m excited to share the simple ingredient list that makes these air fryer recipes so deliciously spooky! You probably already have most of these ingredients in your pantry. No need to hunt down specialty items or make multiple grocery store trips!
Dough Ingredients
Your dough foundation starts with all-purpose flour – the backbone of any great breadstick recipe. You’ll need active dry yeast to give your dough that perfect rise and texture. Warm water helps activate the yeast, while a touch of sugar feeds it for optimal results.
Don’t forget the essential flavor builders! Salt enhances every bite, and olive oil creates that tender, golden texture we’re after. These basic ingredients work together beautifully in air fryer recipes, creating breadsticks that are crispy outside and soft inside.
Spooky Decoration Elements
Here’s where the magic happens! Whole almonds become realistic fingernails – such a clever touch that always gets gasps from party guests. An egg wash gives your zombie fingers that gorgeous golden-brown color.
Coarse sea salt adds texture and flavor, while garlic powder and Italian seasoning blend create that irresistible savory taste. These simple additions transform ordinary breadsticks into spine-tingling treats!
Dipping Sauce Components
Your blood-red marinara sauce starts with quality store-bought marinara as the base. A splash of balsamic vinegar adds depth and richness. Red pepper flakes bring optional heat that complements the savory breadsticks perfectly.
Fresh basil elevates the entire flavor profile when available. These sauce ingredients store well, making this one of those air fryer recipes you can prep ahead for stress-free entertaining!
| Ingredient Category | Key Items | Quantity Needed | Purpose |
|---|---|---|---|
| Dough Base | All-purpose flour, yeast, warm water | 2 cups flour, 1 packet yeast | Structure and rise |
| Flavor Enhancers | Salt, olive oil, sugar | 1 tsp salt, 2 tbsp oil | Taste and texture |
| Spooky Decorations | Almonds, egg, seasonings | 20 almonds, 1 egg | Visual appeal |
| Dipping Sauce | Marinara, balsamic, herbs | 1 cup sauce, 1 tbsp vinegar | Flavor complement |
Equipment and Tools You’ll Need
Let’s get the tools ready to make these creepy zombie fingers! You might already have most of what you need in your kitchen. No need for fancy gadgets or expensive tools – just an air fryer and basic kitchen items!
Being organized before you start makes things easier. I like to arrange my tools first. This way, everything is ready when I’m ready to make those spooky treats!
Air Fryer Requirements
Your air fryer is the key to making these zombie fingers! Any air fryer with a basket size of at least 3 quarts works great. Bigger models let you cook more at once, perfect for parties!
I prefer my air fryer because it makes things crispy without heating up the kitchen. It’s also faster than baking in the oven! Make sure your air fryer basket is clean and ready.
Essential Kitchen Tools
Here’s what you need to make perfect zombie fingers:
- Large mixing bowl for combining dough ingredients
- Measuring cups and spoons for accurate portions
- Clean kitchen towel to cover rising dough
- Sharp knife for shaping finger details
- Pastry brush for applying egg wash
- Small spoon for creating knuckle indentations
If you have air fryer parchment paper, that’s great for easy cleanup. But it’s not necessary. The best thing about making zombie fingers is how easy it is for everyone!
Preparing Your Zombie Finger Dough
The key to great Halloween party food is in the dough. This is where the magic starts! A well-prepared dough will make your breadsticks look spooky and taste amazing.
Mixing the Base Dough
Begin by mixing yeast in warm water, about 110°F. The water should feel like your wrist’s bath temperature. Add a bit of sugar and wait for 5 minutes until it foams.
This foam means your yeast is ready to go. In a big bowl, mix flour and salt. Make a well in the center. Pour in your foamy yeast mixture and olive oil.
Mixing with your hands is fun and gives you control. The dough should be sticky. It’s okay if it looks messy at first.
Achieving the Right Consistency
The dough should be soft and pliable. If it’s too sticky, add flour slowly. If it’s too dry, add water a little at a time.
Knead the dough for 5-8 minutes on a floured surface. It’s ready when it’s smooth and elastic. This makes your breadsticks perfect.
Resting and Rising Tips
Put your kneaded dough in an oiled bowl and cover it with a damp towel. Let it rise in a warm spot for about an hour until it doubles in size.
Pro tip: I put mine on the top of the refrigerator or near a sunny window! This time is great for getting ready for shaping.
While it rises, the yeast makes air bubbles. These bubbles will make your zombie fingers light and fluffy.
Shaping the Perfect Zombie Fingers
Now, the fun begins in our breadstick recipe. We turn the dough into spooky zombie fingers. Your kitchen will feel like a haunted lab.
After the dough rises, punch it down and split it into 8-10 parts. Make them 4-5 inches long. They’re like real fingers but tastier!
Creating Realistic Finger Shapes
Roll each piece into a log, but don’t make them round. Real fingers are irregular. Embrace those quirks.
Stretch and roll each piece, making one end wider for the base. Taper the other end for a finger-like shape. Some should curve, others straight. Variety is key for realism.
Take your time shaping. It’s what makes them spooky. Even if they’re not perfect, they’ll look great in your breadstick recipe!
Adding Knuckle Details
Now, let’s add knuckle details for a creepy touch. Use your finger or a spoon to make 2-3 indentations on each finger.
Make the indentations just deep enough to show joints. It’s like magic when people see them!
Use gentle pressure for the best results. Too much force will ruin your finger shape, while too little won’t show the joints well.
Attaching Almond “Fingernails”
For the final touch, press a whole almond into the narrow end of each finger. Make sure it looks like a fingernail.
Almonds can be pointy, which is perfect for zombie nails. If an almond breaks, it’s even better.
Twist and bend each finger slightly before placing them on the air fryer tray. Straight fingers are too perfect. We want them to look creepy.
Even if your first try at this breadstick recipe isn’t perfect, they’ll look and taste amazing!
Air Fryer Zombie Finger Breadsticks Cooking Process
This is where the magic happens – turning your carefully shaped dough into irresistible Halloween appetizers! The air fryer transforms these spooky creations into golden, crispy perfection in just minutes. I absolutely love watching them come to life with that perfect crunch and beautiful color!
Preheating Your Air Fryer
Start by preheating your air fryer to 350°F for 3-5 minutes. This step is key for even cooking. While it’s heating up, brush each finger gently with beaten egg wash.
The egg wash gives them that gorgeous golden color we’re after. Sprinkle each finger with a pinch of coarse salt and garlic powder. The aroma is already making my mouth water!
Optimal Temperature and Timing
Place your zombie fingers in the air fryer basket, making sure they’re not touching each other. They need space to get crispy all around! Depending on your air fryer size, you might need to cook them in batches.
| Batch Size | Temperature | Cooking Time | Flip Time |
|---|---|---|---|
| 4-5 fingers | 350°F | 12-15 minutes | 6-7 minutes |
| 6-8 fingers | 350°F | 14-16 minutes | 7-8 minutes |
| Thick fingers | 340°F | 15-18 minutes | 8-9 minutes |
Here’s my secret: flip them halfway through! This ensures they get beautifully golden on all sides. The timing can vary slightly depending on your air fryer model and finger thickness.
Checking for Doneness
Keep an eye on them after the 10-minute mark. You’ll know they’re perfect when they’re golden brown and sound hollow when you tap them gently. The almonds should be lightly toasted but not burnt.
If some fingers are browning faster than others, remove the done ones and let the others cook longer. Don’t worry if they look uneven – that adds to the zombie authenticity!
The smell filling your kitchen right now is absolutely incredible – that perfect combination of garlic, herbs, and fresh-baked bread.
Let them cool for just a few minutes before serving. They’re best enjoyed warm when that exterior is crispy!
Creating the Blood-Red Marinara Dipping Sauce
The perfect blood-red marinara sauce turns your zombie finger breadsticks into scary food that will haunt your guests’ memories! This dramatic touch makes your Halloween presentation spectacular. I’m excited to share two fantastic approaches for any time constraint or cooking preference.
Enhancing Store-Bought Sauce
For a quick and easy start, use your favorite store-bought marinara sauce. I prefer a chunky variety for extra texture! Heat it gently in a small saucepan and add a splash of balsamic vinegar.
This deepens the color and adds incredible depth of flavor. A pinch of red pepper flakes gives it subtle heat perfect for Halloween! Stir in some fresh minced garlic and a touch of brown sugar to balance the acidity.
The result? A rich, blood-red sauce that looks authentically spooky. It transforms ordinary breadsticks into memorable scary food!
Homemade Spooky Sauce Recipe
If you’re feeling adventurous, try my homemade version! Sauté minced garlic in olive oil, then add crushed tomatoes and tomato paste for that deep red color. Season with Italian herbs, salt, and pepper.
My secret ingredient is a tiny bit of red food coloring for that perfect “blood” hue! Let it simmer for 15-20 minutes until it thickens beautifully.
Either way, serve it warm in a small bowl placed dramatically in the center of your finger platter. The contrast of golden breadsticks against deep red sauce creates stunning, deliciously creepy scary food that guests will never forget!
Presentation and Serving Ideas
Turn your zombie finger breadsticks into a spooky centerpiece that will thrill your guests! The way you present these treats makes them unforgettable Halloween treats. It’s where your creativity really comes alive!

Spooky Plating Techniques
Begin with a dark plate or wooden cutting board for drama. The contrast makes your zombie fingers look terrifying! I prefer using black slate boards or dark parchment paper-lined plates.
Arrange your breadsticks in a scattered pattern, not neat rows. Real zombie fingers wouldn’t be perfectly organized, right? Create a “graveyard” scene by sticking some fingers upright in a bowl of marinara sauce. It looks like they’re clawing their way out!
Halloween Party Setup
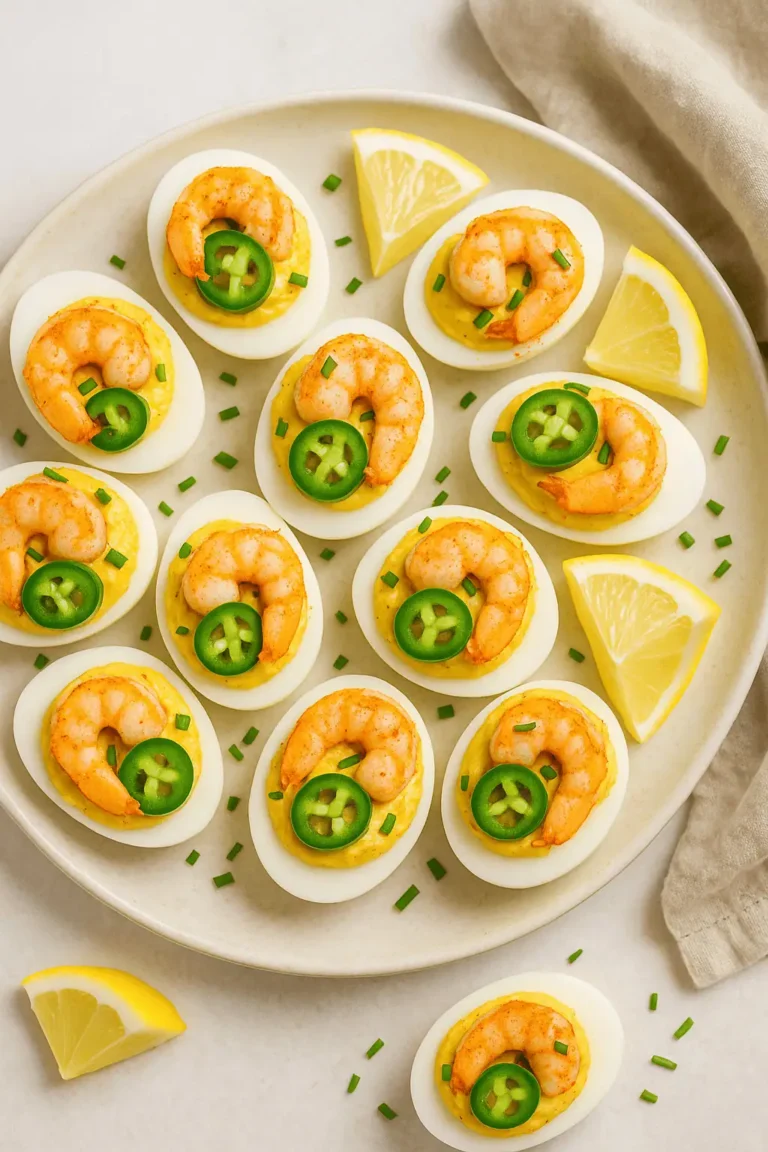
Set up different “stations” around your table for your Halloween treats. Place the zombie fingers near other spooky snacks like “dirt” cake or “spider” deviled eggs. This makes the food experience interactive and fun!
Dim lighting or candles add an eerie atmosphere. String lights in orange and purple add perfect Halloween ambiance without being too dark.
Remember to have small plates and napkins nearby. Your guests will want to grab these Halloween treats easily during the party!
Garnishing for Maximum Effect
Fresh herbs like rosemary can look like twigs or grass around a graveyard scene. Sprinkle some paprika around the plate for a “dusty” effect, or use black sesame seeds for extra spookiness!
The key is creating a theatrical experience that gets everyone laughing and reaching for their cameras. Your zombie finger breadsticks will be the star of the show!
Troubleshooting Common Issues
Let’s tackle the most common problems you might face when making these spooky treats in your air fryer! Even the best bakers encounter hiccups, but I’m here to help you solve them quickly and easily.
Don’t let small setbacks discourage you – these solutions will have you back on track in no time!
Fixing Dough Problems
If your dough isn’t rising properly, it’s usually a yeast issue. Check that your water wasn’t too hot, which kills yeast, or too cold, which makes it sluggish.
Here are quick fixes for common dough troubles:
- Slow rising: Move dough to a warmer spot or turn on your oven light and place the bowl inside
- Sticky dough: Add small amounts of flour while kneading – resist adding too much at once!
- Dense texture: Ensure your yeast is fresh and water temperature is around 110°F
Air Fryer Cooking Adjustments
Remember that all air fryers cook differently! Air fryer cooking requires some trial and adjustment for perfect results.
If your fingers are browning too quickly, reduce temperature to 325°F and cook longer. Not golden enough? Increase to 375°F but watch closely!
For uneven cooking, try these air fryer cooking tips:
- Rotate the basket halfway through cooking
- Rearrange fingers if they’re different sizes
- Cover almonds with foil if they brown too fast
Remember, even “imperfect” zombie fingers look more authentic – embrace those quirks!
Creative Variations and Flavor Twists
Zombie finger breadsticks are perfect for Halloween entertaining! They can be many flavors. Each one adds something special to your party.

Different Seasoning Options
Change your zombie fingers with new seasonings! Try an everything bagel version for a savory taste. It’s delicious!
For a Mediterranean twist, use dried oregano, basil, and parmesan cheese. Add chili powder and cumin for a spicy “Mexican Zombie Fingers.”
Other great options include:
- Italian herb blend with rosemary and thyme
- Ranch seasoning powder for tangy flavor
- Cajun spice mix for heat lovers
- Sesame seeds for extra texture
Alternative Dipping Sauces
Dipping sauces make Halloween entertaining more fun! Try a creamy ranch “poison” dip. Or a “witch’s brew” cheese sauce with black food coloring.
Pesto is great as “swamp water” dip. Beet juice in hummus makes a pink “brain matter” dip. These sauces add color and fun to your Halloween entertaining spread.
Dietary Modifications
These can be made for different diets! For gluten-free, use a gluten-free flour blend. Add xanthan gum if needed.
For vegan versions, use plant milk and olive oil. You can make them small for kids or big for adults!
This recipe is great for inclusive Halloween entertaining. Everyone can enjoy these spooky treats!
Storage and Reheating Instructions
Keeping your zombie finger breadsticks fresh and delicious is easy! It’s a bummer when these spooky appetizers lose their crispiness. Here are my top tips to keep them tasting great!
Proper Storage Methods
For up to two days, let them cool down completely first. This stops them from getting soggy. Store them in an airtight container at room temperature.
Put a paper towel at the bottom to soak up moisture. If stacking, use parchment paper between layers to avoid sticking.
For longer storage, they freeze well! Wrap each one in plastic wrap, then in a freezer bag for up to three months.
| Storage Method | Duration | Temperature | Special Tips |
|---|---|---|---|
| Room Temperature | 2 days | 68-72°F | Use paper towel liner |
| Refrigerator | 5 days | 35-40°F | Airtight container only |
| Freezer | 3 months | 0°F | Wrap individually first |
Best Reheating Techniques
The air fryer is your best friend for reheating! Reheat at 350°F for 3-4 minutes if they’re room temperature. Add 2-3 minutes if they’re frozen.
You can also use a regular oven at 375°F for 5-7 minutes. Avoid the microwave – it makes them chewy instead of crispy!
The marinara sauce lasts up to a week in the fridge. Make extra sauce and freeze it in ice cube trays for future spooky appetizers!
Making Your Halloween Party Extra Spooky
Turn your Halloween party into a spooky experience that guests will remember. I’m excited to share these party planning secrets. The right atmosphere makes every bite taste even better. Your Halloween baking creations deserve a setting that’s just as impressive as their flavors!
Pairing with Other Halloween Treats
Your zombie finger breadsticks go great with other creepy treats. Try “spider” deviled eggs with olive slices for legs, or “dirt” cake with gummy worms. Mummy-wrapped jalapeño poppers add a spicy kick to your Halloween baking lineup!
Creating variety in textures and flavors is key. Add “bloody” beet hummus, “witches’ brew” punch, or “graveyard” brownies with cookie tombstones.
Creating a Themed Food Display
Design your Halloween baking masterpieces like a movie set designer. Use different heights with cake stands, books, or boxes covered in black cloth. Make “tombstones” from foam board for food labels – write fun phrases like “RIP Diet” or “Here Lies Hunger” in spooky fonts!
Add dry ice for safe fog effects around your food table. String up fake spider webs, scatter plastic spiders, and use battery-operated candles for flickering ambiance. Don’t forget creepy background music to complete the atmosphere!
Zombie Finger Breadsticks
Spooky Air Fryer Halloween Treats
Ingredients
Dough Base
- 2 cups all-purpose flour
- 1 packet active dry yeast
- 3/4 cup warm water
- 1 tbsp sugar
- 1 tsp salt
- 2 tbsp olive oil
Decorations
- 20 whole almonds (for nails)
- 1 egg, beaten (for egg wash)
- Garlic powder, Italian seasoning, coarse salt
Dipping Sauce
- 1 cup marinara sauce
- 1 tbsp balsamic vinegar
- Red pepper flakes (optional)
Instructions
- Mix yeast, sugar, and warm water. Let foam for 5 minutes.
- Combine flour and salt. Add foamed yeast and olive oil. Mix into sticky dough.
- Knead on floured surface for 5–8 minutes. Place in oiled bowl, cover, and rise for 1 hour.
- Divide dough into 8–10 pieces. Roll into finger shapes, add knuckle creases and almond nails.
- Brush with egg wash, sprinkle with seasonings.
- Preheat air fryer to 350°F. Cook in batches for 12–15 minutes, flipping halfway.
- Heat marinara sauce with balsamic vinegar and red pepper flakes.
- Serve warm with “bloody” dipping sauce!
Conclusion
Creating memorable creepy food is easy, even if you’re not a pro in the kitchen. You’ve learned how simple ingredients can turn into spooky treats that impress everyone!
This recipe is all about being flexible. Your zombie fingers don’t have to be perfect. It’s the little imperfections that make them truly spooky. Each batch is unique, just like real Halloween magic.
Using an air fryer makes cooking easy and keeps your kitchen cool. You can enjoy your guests more without worrying about a hot oven.
This recipe is now a part of your Halloween tradition. It’s perfect for any Halloween party or a fun weeknight treat. The zombie fingers are both a feast for the eyes and a treat for the taste buds.
The best parties are the ones where everyone has fun. Don’t worry about making everything perfect. Just enjoy the spooky atmosphere and let your creativity run wild. Your guests will have a blast and remember the fun long after the party.
So, put on your apron and start making some deliciously scary memories!


